Showing posts with label gradient. Show all posts

Monday, April 15, 2013

Catch Up Post! Vintage Roses, Neon Gradient & [Early] Swatch Tuesday!

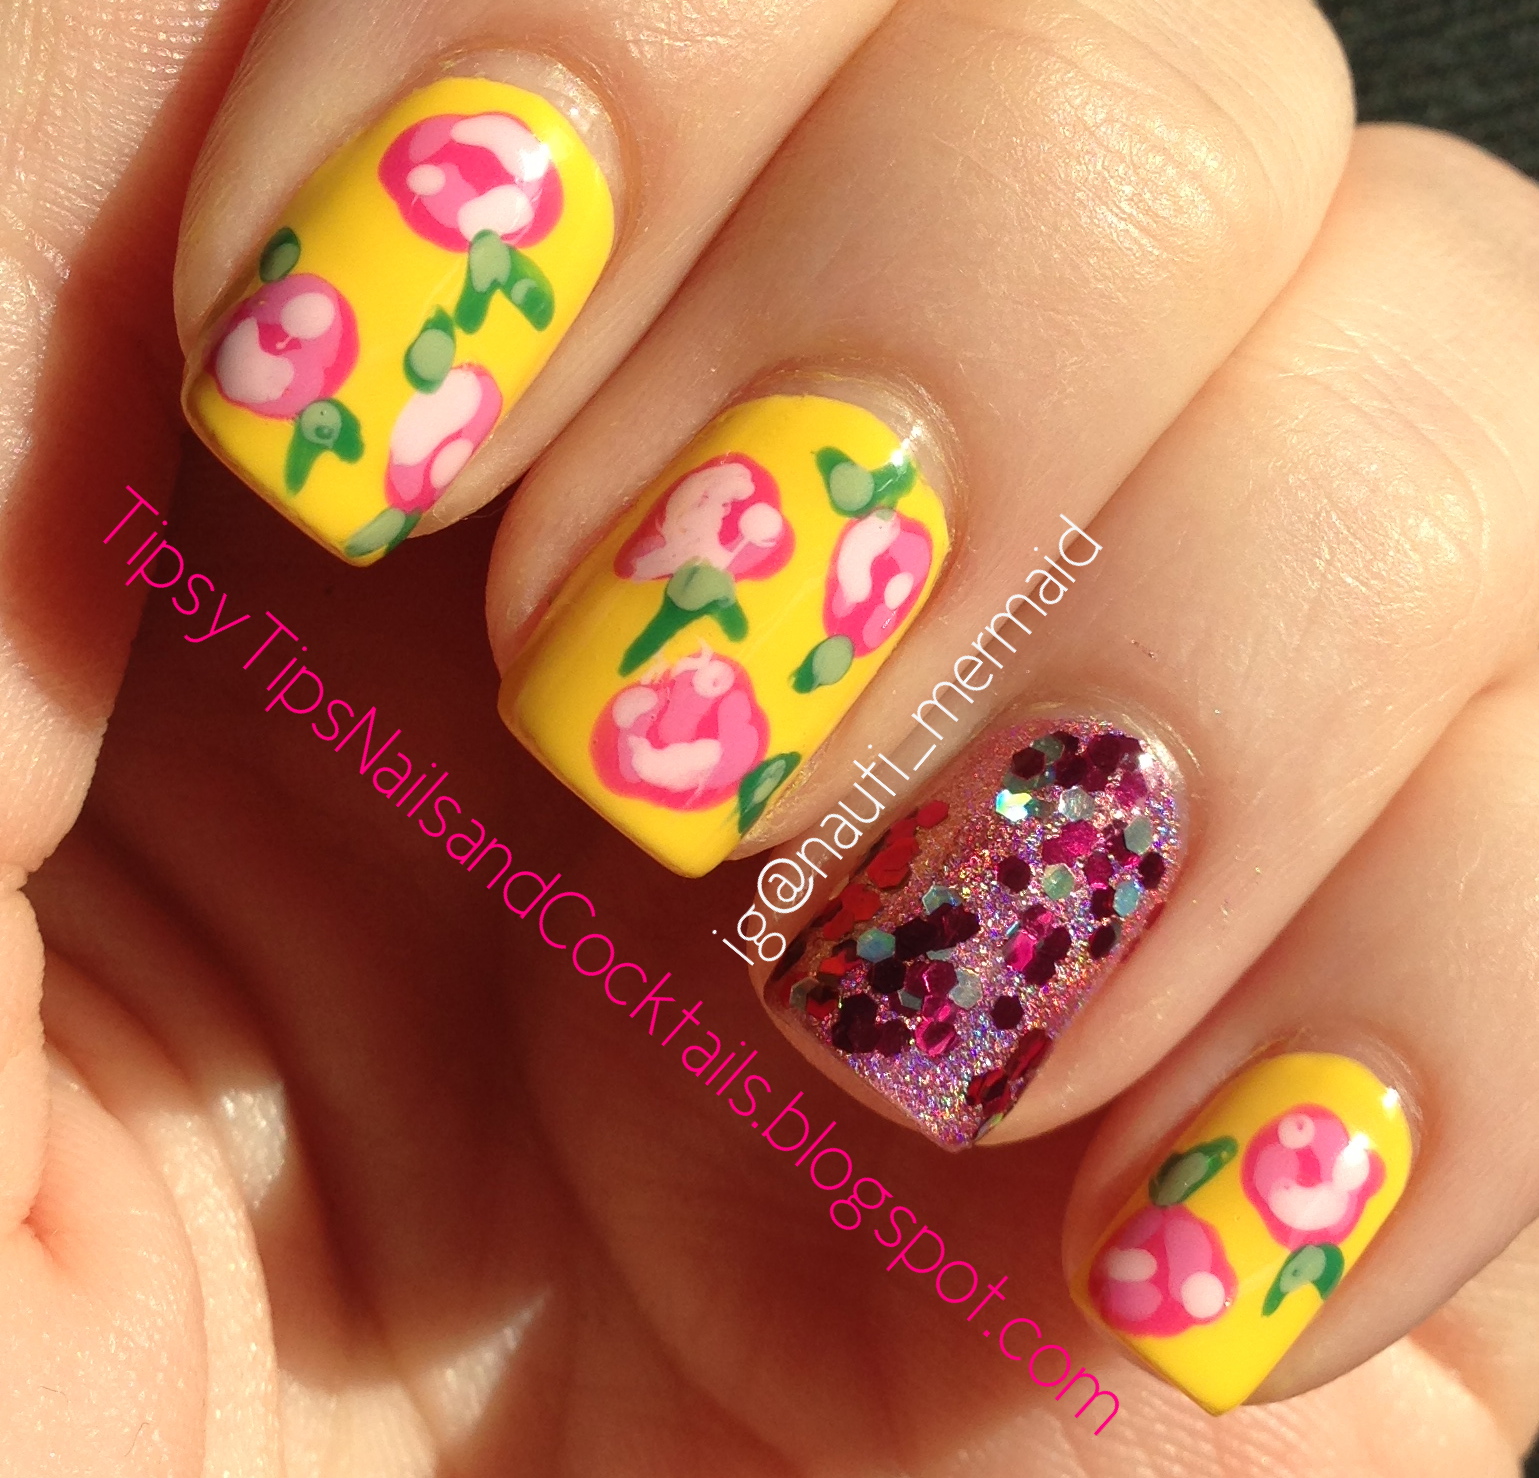
Clearly I suck at keeping up with my posts on here.  I'm so used to posting on IG all the time as soon as I'm done with my manis :( Anyways, I FINALLY attempted vintage roses that turned out VERY successful in my opinion!
Vintage Roses
Vintage Roses
I used a crazy amount of nail polish for this.  Ya ready?
Yellow Base: Milani Yellow Whiz
Roses: Essie Mod Square, Cascade Cool, and Fiji
Leaves: Essie Pretty Edgy and Navigate Her
Pink Holo Accent Nail: Color Club Miss Bliss topped with Milani Jewel FX Hot Pink
When I get a little better I hope to do a tutorial for this look! 

I also did a kick ass neon gradient!
I used China Glaze Yellow Polka Dot Bikini and Japanese Koi over SC Snow Me White.
ChG Neon Gradient 
ChG Neon Gradient
ChG Neon Gradient
Like my sweet new black light?!
Gradient vs. Ombre: What the Fuck is the Difference??  IS there a fucking difference?
The answer is YES THERE IS A DIFFERENCE!  and no its not because ombre is a trendy hipster term.  Damn hipsters.
I digress.
The difference between a gradient and ombre is as follows:
**********
Gradient uses two or more DIFFERENT colors...such as mine above.
Ombre uses different shades of the SAME color...such as fading from light green to dark green.
Think of it like this: GradienT, differenT; OmbrE, samE
**********
Annnnnd it IS Swatch Tuesday after all [tomorrow], so enjoy this swatch of SC Dream On.
Two coats Sinful Colors Dream On
Two coats Sinful Colors Dream On
I did two coats Dream On, no undies, no tops.  Its a beautiful vivid purple that dries squishy-matte.  I am so in love!  BUT it chips so easy!  I did this late Sunday night and I had three fingers chip before I even got to work at 8:30 this morning! :(  I'm sure it had to do with the fact I didn't topcoat it, but I loved the matte look.

So apparently I can't stick to a certain "schedule" with my manis and posting, so I'm just going to post on my blog as I do my nails.  I'll still do drinks [obviously ... TIPSY Tips lol] but it might just not be specifically on Friday any more.  And Swatch Tuesday might happen on a Monday or something.  We shall see.  Life is hard when I have to decide between cooking myself dinne [or like, showering or drooling over Don Draper on Mad Men] and doing my nails

As usual: follow me on Pinterest & IG [@nauti_mermaid].

Friday, March 22, 2013

Sex In The Driveway and Holo Gradient Mani

Hello Lovelies!  Happy Friday!  We made it through another week!  Today I have a pretty drink and a super awesomesauceballz mani for you :]

To make Sex In The Driveway,
You'll Need:
Your Boyfriend...
A Car...
haha JUST KIDDING!
You'll [really] Need:
Vodka
Peach Schnapps
Blue Curacao
Sprite
Ice

Make It!
Cup, ice, a shot each of vodka, curaƧao, & schnapps.  Top with Sprite.  I can't wait to make this!  Sadly, my whole liquor cabinet is still at my parents' house.  All I have at the moment is wine booooo! lol
Photo found on Pinterest.  Link to pin here.

Holo Gradient Mani
I have seen girls on IG do a holo gradient, but I could never see the color differentiation.  I decided to do two colors that would have no problem showing up.  I used two coats Color Club Kismet [Spring 2013 collex] as the base.  I used Over the Moon as the gradient color.  I love how it turned out!  I'll post sunlight pics at a later time because there's no sun out now.  My quick gradient tutorial can be found here.
Color Club Kismet & Over the Moon gradient
Color Club Kismet & Over the Moon gradient
Have a great weekend loves!

*-*-*-*-*
Follow me on Pinterest @miss_best & IG @nauti_mermaid

Friday, March 8, 2013

Moscato Spritzer and Random Nail Art

Well shoot guys!  I'm out of practice!  Completely forgot about my usual Friday post so I'm scrambling to write this quickly.

Today I have this simple drink recipe that I found on Pinterest.  To make a Moscato Spritzer,

You'll Need:
Moscato [Barefoot brand is my favoritest of all]
OJ
Cranberry Juice

Make It!
This recipe only calls for one ounce of wine with 1/2 oz each of OJ & cranberry juice.  I don't know about you, but that's what I'd call a shot.  So lets step this up a tad, shall we??  Fill your glass with a few glugs of wine...about half full.  Then add OJ & cranberry to taste.  We make big girl drinks around these parts!  lol

Random Nail Arts!
In my new found freedom of polishing my nails whenever I want, I have been stepping up my nail art [yay!].  Below are a few designs I'm particularly proud of :)

First, I have a successful kick ass blue to purple gradient* topped with glittahhhh!  I used Essie Bikini So Teeny as the blue base and phased into L'Oreal Royalty Reinvented then topped with China Glaze Make a Spectacle.  I did these with my polish buddy Katie [as in nail polish...not actually Polish] for the Bestie Twin Nail tag on IG.
*my quick gradient tutorial found here.
Next is a schweeeeet nude holographic and bright red freehanded leopard print mani.  I used Color Club Cherubic as the nude base, and China Glaze Hey Sailor as the red base.  I dotted with the same and used Sally Hansen Onyx for the black.  Also did this look for BTN with Katie.
On to the mints!  I REALLY like mint lately!  I used China Glaze Re-Fresh Mint and Color Club Harp On It for this mani.  I was attempting chevrons for the NailArtMar challenge by @californails on IG.  This was my first ever "chevron" attempt.  I don't think this should actually qualify as chevron, but whatever.  It turned out decent enough.  I used painter's tape [frog tape] to make the triangles.  
Lastly, for BTN and the NailArtMar [stripes], I did mint base with gold zebra stripes.  I used Sally Hansen Mint Sorbet, stamped with Essie Good As Gold [Bundle Monster stamp plate BM-223].  On the accent nail I used Black Cat Lacquer Doomsday [or as I call it: #HOLYSHITBALLZANDGLITTER].  

Okay y'all!  Enjoy your weekend!  Next Friday I hope to include a mocktail drink as well for all the youngins, pregos, or non-alcoholics...whatever your situation may be!  ;P 


Sunday, January 20, 2013

Quickie One Color Gradient Tutorial

Hi lovelies!  I had a lot of positive feedback about my last mani (the successful one lol), so I wanted to show my technique.

First, gather all your supplies:
Polish Remover
Base Color (Sinful Colors Snow Me White)
Makeup Sponges
Gradient Color(s) (China Glaze A Rose Among Thorns [pink/red] & Sun Worshiper [yellow/orange])
Cleanup Supplies (Orange Sticks, Brushes, & Polish Remover Pen)

Step 1 Paint your nails a base color.  Let it dry completely.  I didn't let my pointer dry, and the base came off on the sponge.  No bueno :(
Step 2 Paint the base color and gradient color onto the makeup sponge.  Paint the base color at the top of the sponge and the gradient color under it.  
Step 3 Dab the sponge onto your nail.  Dab in slightly different places to blend the colors on your nail. 
Then clean up using your tools.  Putting tape around your nail works great, but I am currently out of tape, so you get to see the mess!
Step 4 Paint the gradient color on the bottom of the makeup sponge.  Dab on the very tip of your nail.  This way, the color will be darkest there.

Repeat Step 3 to get rid of the harsh line.
Step 5 Clean and seal with a topcoat.

Friday, January 18, 2013

Hibiscus Martini and Gradient Mani Fail/Redemption

Hello lovelies!  Happy Friday :)  Sorry I completely forgot about my Wasted Wednesday post.  I stayed home sick on Tuesday and got sucked in to watching the whole first season of American Horror Story. Anyways, I have a GREAT drink recipe (similar to last weeks) and some nail fail/redemption pics.

To make a Hibiscus Pom Martini,
You’ll Need:
Absolut Hibiskus
Stirrings Pomegranate Mixer
Stirrings Pomegranate Sugar
Ice

Make It!
Rim a glass with the sugar.  Combine one shot vodka with two shots mixer.  Shake in a glass with ice. Strain into sugar rimmed glass.

This tastes JUST like a Passion Tea Lemonade from Starbucks.  LOVE it!  And the vodka bottle is pretty; so that’s a plus.

Gradient Nail FAIL and Redemption
I started out with this great idea in my head.  I was going to attempt a gradient that looked like a sunset.  I started with China Glaze Peachy Keen as the base.  Gorgeous right?!  Well, that was the prettiest it’s gonna get.  lol
Two coats China Glaze Peachy Keen
China Glaze Peachy Keen, Escaping Reality
and Japanese Koi (neon)
I tried to do the gradient with ChG Escaping Reality (pink) and Japanese Koi (neon) (orange).  Ehhhh it didn’t look as good as I envisioned it.  I would have suffered through it, but I was out from work one day so I decided to attempt again.
Julep Eileen and
China Glaze Yellow Polka Dot Bikini
Julep Eileen and
China Glaze Yellow Polka Dot Bikini
This one was MUCH better.  I only used one color (ChG Yellow Polka Dot Bikini) over Julep Eileen.  It’s really hard for me to explain if you don’t know the method for gradients.  I am hoping to do a tutorial one of these days.  Not like I’m an expert, obviously, but the way I did it worked for me.  In a nutshell, follow these steps:
Paint your nails a base color (Julep Eileen) and let it dry completely.
On a makeup sponge, apply the base color and the gradient color.
Dab the sponge on the nail.  Be sure to dab the sponge in different areas of the nail, in order to blend the colors (so you don’t get such a harsh color line like my first attempt).
Turn the sponge over and paint some of the gradient color (ChG Yellow Polka Dot Bikini) onto it. 
Dab this on the very tip of the nail to give full color coverage.
Flip the sponge back over to blend once more.
Let dry briefly.  Seal with a topcoat to smooth sponge marks.

Like I said, it’s a little hard to explain without step-by-step. I will try to do one ASAP. 
I’ve only attempted gradients probably about three times.  This is the best I’ve done and I’m very proud of these babies :D

*-*-*-*-*
Follow me on IG @Nauti_Mermaid
Follow me on Pinterest